
Lighting Guide | Size Calculator & Lighting Planner

THE ZENDUCE DESIGN STUDIO

Beautiful light.
Perfectly placed.

Find the right proportions. Create the right atmosphere. A considered guide to lighting every corner of your home.

Find your perfect fit
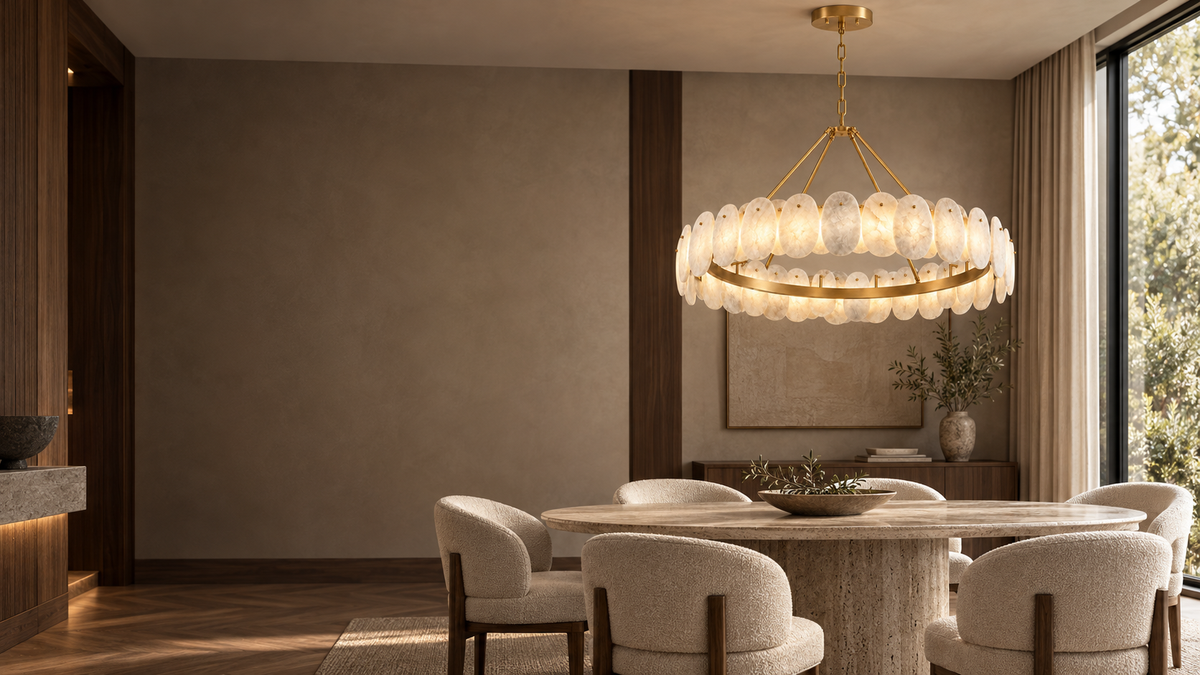
Soleil alabaster and brass chandelier above a travertine dining table in a warm, elegant room
THE ART OF LIVING IN GOOD LIGHT

PROPORTION, MADE SIMPLE

A considered fit for your space.

From a statement chandelier to the light beside your bed. Choose your setting for a personal sizing and placement guide.

THE DETAILS MAKE THE DIFFERENCE

Every light, in its place.

What to measure, where to position and how to check the fit. Explore seven practical guides before making it yours.

THE PLACEMENT GUIDE / 01

Light over the table.

A considered composition for everyday meals and evenings that linger.

Linear fixture over a dining table Schematic, not to scale. drop: From the ceiling. clearance: Above the table. size: Table proportionLinear fixture over a dining tableLength · Table proportionOverall dropFrom theceilingAbove surfaceAbove thetableSCHEMATIC · NOT TO SCALE

01 / What to measure

  • Measure the table length, width and height. For a round table, use its diameter. Include any extension you regularly use.
  • Measure the ceiling above the table and note where guests sit, stand and move around it.

02 / Find your proportions

  • Begin around one-half to two-thirds of the table width for a round fixture. For a linear design, use the same proportion of table length as a first comparison.
  • Check the fixture’s width as well as its length. It should remain comfortably within the tabletop footprint.

03 / Position with purpose

  • Align the light with the table, even if the table sits away from the room’s centre.
  • For a long table, compare a single linear fixture with a balanced pair of smaller pendants; judge the whole arrangement together.

04 / Check the details

  • Start with the lowest point 30–36 in (76–91 cm) above the tabletop, then check the view across the table.
  • Measure the complete ceiling-to-light drop. A tall ceiling does not automatically require raising the light away from the dining surface.
  • Confirm compatible dimming if the same table is used for dining, homework and entertaining.

TRY IT IN YOUR SPACE

Suspend lightweight paper shapes at the proposed height. Sit in each usual seat and check faces, centrepieces and the path around the table.

Explore dining pendants ↗

THE PLACEMENT GUIDE / 02

Balance along the island.

Bring a clear rhythm to the kitchen without crowding the work surface.

A group of island pendants Schematic, not to scale. size: Widest part. drop: Full fixture height. spacing: Centre to centre. offset: From island end. clearance: Clear sightlinesA group of island pendantsPendantdiameterWidest partDrop · Full fixture heightCentre spacingCentre tocentreEnd centreinsetFrom islandend3 pendantsAbove surfaceClearsightlinesSCHEMATIC · NOT TO SCALE

01 / What to measure

  • Measure the island length, width, counter height and ceiling height. Decide which part of the counter needs light.
  • Record each pendant’s widest diameter and note stools, sinks, cabinets, extractors and nearby door swings.

02 / Find your proportions

  • For a linear light, begin around one-half to two-thirds of the island length and check its width against the counter.
  • For separate pendants, consider diameter and quantity together. Try the full arrangement before committing to a count.

03 / Position with purpose

  • A balanced starting layout divides the chosen island run into equal bays, with a pendant centred in each bay. The first and last centres sit half a bay from the ends.
  • Keep the row aligned over the work surface. Centre-to-centre spacing is different from the clear gap between shades.

04 / Check the details

  • Begin 30–36 in (76–91 cm) above the counter, then test sightlines and useful light on the worktop.
  • Check shade-to-shade gaps, both end insets and side clearances using the actual pendant diameter. A layout that fits geometrically may still feel crowded.
  • Confirm that the selected fixtures provide the light you need; spacing alone cannot predict brightness or coverage.

TRY IT IN YOUR SPACE

Lay out every proposed shade with paper circles, then lift or suspend the complete row at the intended height. Review it from the working and seating sides.

Explore island pendants ↗

THE PLACEMENT GUIDE / 03

The room centrepiece.

Give the room a focal point that feels at home with its architecture and furniture.

Room chandelier or pendant Schematic, not to scale. drop: Fixture + suspension. clearance: Open walkways. size: Room proportionRoom chandelier or pendantOverall dropFixture +suspensionFloorclearanceOpen walkwaysDiameter · Room proportionSCHEMATIC · NOT TO SCALE

01 / What to measure

  • Record the length and width of the room or the seating zone you want to define, plus the finished ceiling height.
  • Mark door openings, tall furniture, slopes and the routes people use through the room.

02 / Find your proportions

  • For a first diameter, add the room length and width in feet and read the total in inches. A 14 × 12 ft room suggests about 26 in.
  • In metric, add length and width in metres and multiply by 8.33 for centimetres. Compare the result with the actual silhouette: a dense shade can feel larger than an open frame.

03 / Position with purpose

  • Choose a centre that relates to the main furniture arrangement as well as the room.
  • Consider a flush or compact semi-flush design where suspension would leave too little clearance.

04 / Check the details

  • Use at least 7 ft (213 cm) below the lowest point as a walking-clearance starting point; confirm doors, household needs and installation requirements.
  • Overall drop includes the canopy, suspension and fixture body. Check both the product’s minimum drop and the available ceiling-to-floor space.
  • Ask your installer to confirm the fixture weight, junction-box support and any additional bracing.

TRY IT IN YOUR SPACE

Mark the proposed diameter on paper and view it in place from the doorway and your usual seat. A simple silhouette makes the scale easier to judge.

Explore chandeliers ↗

THE PLACEMENT GUIDE / 04

A welcoming passage.

Let a sequence of lights lead the eye through the hall.

Flush lighting along a corridor Schematic, not to scale. spacing: Even intervals. offset: Half the spacing. clearance: Open walkwaysFlush lighting along a corridorEnd centreinsetHalf thespacingCentres · Even intervalsFloor clearanceOpen walkways3 fixturesSCHEMATIC · NOT TO SCALE

01 / What to measure

  • Measure the clear corridor length, width and finished ceiling height.
  • Mark door swings, changes in ceiling level, stairs and any furniture that narrows the passage.

02 / Find your proportions

  • For ceiling fixtures, 8–10 ft (244–305 cm) between centres is a useful first layout to test. Around 8 ft (244 cm) is a common starting rhythm for pendants.
  • Choose compact widths that suit the passage. The final count and spacing depend on the fixture’s light output, beam spread and the room surfaces.

03 / Position with purpose

  • Use the path centreline as your reference and compare evenly spaced layouts.
  • Dividing the hall into equal bays places the end fixtures half a bay from each end. Adjust around doors and architectural features.

04 / Check the details

  • Preserve at least 7 ft (213 cm) beneath the lowest point as a planning minimum, and check the complete drop against doors and stairs.
  • Check the light distribution with the actual product. A decorative spacing plan does not establish a required illumination level.
  • Compatible dimming or separate controls can make a long passage more comfortable after dark.

TRY IT IN YOUR SPACE

Mark all fixture centres with removable tape. Check the sequence from both ends of the hall, and open every adjacent door before finalising positions.

Explore ceiling lights ↗

THE PLACEMENT GUIDE / 05

A flattering mirror moment.

Place the light around the face for a clear, comfortable reflection.

Wall lights beside a mirror Schematic, not to scale. height: Light both sides. spacing: Across the mirror. offset: Allow breathing roomWall lights beside a mirrorBackplatecentreLight bothsidesCentres · Across the mirrorMirror edgegapAllowbreathing roomSCHEMATIC · NOT TO SCALE

01 / What to measure

  • Measure mirror width and height, vanity width and the clear wall space on each side. Note the sink centreline.
  • Check the principal users’ eye levels and the space needed for cabinet doors and nearby fittings.

02 / Find your proportions

  • For an over-mirror bar, begin near three-quarters of the mirror width and keep the fixture within its edges.
  • For side sconces, start with the backplate centres around 60–65 in (152–165 cm) above the floor, then adjust to eye level and the fixture’s light source.

03 / Position with purpose

  • Place a pair symmetrically beside the mirror so both sides of the face receive light.
  • Allow a few inches between the mirror and each fixture where space permits. Check the complete shade and backplate dimensions, not just the bulb position.

04 / Check the details

  • Confirm the light’s exact damp or wet-location rating and the installation zone with a qualified electrician.
  • Test reflections: exposed bulbs or bright edges should not shine directly into the user’s eyes.
  • Keep cabinet swings, taps, shelves and adjacent doors clear. Match light colour across fixtures used together.

TRY IT IN YOUR SPACE

Tape a full-size outline of each sconce or bar beside the actual mirror. Have someone hold a temporary light at that height while you check the reflection.

Explore wall lights ↗

THE PLACEMENT GUIDE / 06

Light for winding down.

Set the bedside light from the way you sit, read and reach.

A pendant beside the bed Schematic, not to scale. drop: From the ceiling. height: Chosen level from floorA pendant beside the bedOverall dropFrom theceilingPendant bottomChosen levelfrom floorSCHEMATIC · NOT TO SCALE

01 / What to measure

  • Measure mattress-top height, nightstand width and height, and headboard height.
  • Sit in your usual reading position and record shoulder or eye level. Note where your hand naturally reaches the switch.

02 / Find your proportions

  • Choose a table-lamp shade that sits comfortably inside the nightstand and leaves useful space for everyday objects.
  • For a table lamp, test the lower shade edge near your seated shoulder level. For a sconce, 55–60 in (140–152 cm) to the top of the fixture is one starting reference; adjust it to your bed and posture.

03 / Position with purpose

  • Aim light towards the book and away from your partner’s pillow. Keep switches reachable without stretching.
  • For a bedside pendant, establish the lower edge from the seated view and the nightstand, then check the complete drop and head clearance. There is no single height that fits every bed.

04 / Check the details

  • Clear the headboard, pillows and the movement of sitting up or getting out of bed.
  • Check cords and swing arms through their full range. Confirm that the actual light source is shielded from resting eyes.
  • If the two nightstands differ in height, align the useful light at the seated position rather than matching lamp bases alone.

TRY IT IN YOUR SPACE

Use a paper silhouette or a temporary lamp while sitting and lying in bed. Reach for the switch, turn a page and stand up to check the position in use.

Explore floor and table lights ↗

THE PLACEMENT GUIDE / 07

Your reading corner.

A pool of light where you need it, with the bright source out of view.

A floor lamp beside your reading chair Schematic, not to scale. eye: Seated position. height: Comfortable light. shade: Reduce glareA floor lamp beside your reading chairSeated eyeSeated positionLamp heightComfortablelightShade heightReduce glareSCHEMATIC · NOT TO SCALE

01 / What to measure

  • Sit in the actual chair and measure your eye level from the floor. Also note seat and arm height.
  • Measure the clear floor area, the distance to a socket and the reach needed from the lamp to the page.

02 / Find your proportions

  • For a shaded floor lamp, start with the lower edge of the shade at or just above seated eye level.
  • Overall lamp height depends on the shade and arm design. Use the product dimensions to translate your target shade height into the correct lamp size.

03 / Position with purpose

  • Position the lamp beside or slightly behind your shoulder so it illuminates the page.
  • An adjustable arm or head lets you direct the light as your reading posture changes.

04 / Check the details

  • Check that the base fits the available floor area and that the arm, shade and cord stay clear of the walking route.
  • Keep the bulb and brightest part of the light outside your direct view. Check for reflections on tablets or glossy pages.
  • Test with the room lighting on and off, then choose a brightness and compatible control that feel comfortable.

TRY IT IN YOUR SPACE

Place a temporary light beside the chair and read for a few minutes. Move it until the page is clear and your hand casts as little shadow as possible.

Explore floor and table lights ↗

LAYERS OF LIGHT

A room. A mood. A little magic.

A beautiful room needs more than one light. Build a balanced mix of ambient, task and accent lighting.

The living room edit.

Soft pools of light for conversation, reading and evenings at home.

01 / AMBIENT

Set the foundation.

A chandelier or ceiling light gives the room a welcoming base. Centre it on the main seating area.

02 / TASK

Light the moments.

Place a floor or table lamp beside your favourite reading chair, with light directed onto the page.

03 / ACCENT

Add a little depth.

Wall lights bring a gentle glow to the edges of the room and give art or architectural details their moment.

THE FINISHING TOUCH

Warm, calm and easy to live with.

Start around 2700–3000K for a warm atmosphere. Keep light colour consistent across the room.

BEFORE YOU CHOOSE

Put your layers on separate controls where practical. Check fixture, bulb and dimmer compatibility.

Explore living room lighting ↗

About these recommendations

Our recommendations combine manufacturer guidance, measurements from your space and clearly labelled Zenduce styling preferences. They are a starting point for scale and comfort; room use, sightlines and your chosen fixture can change the final arrangement.

For electrical placement, moisture ratings and structural support, follow your product instructions and local requirements with a qualified installer.