


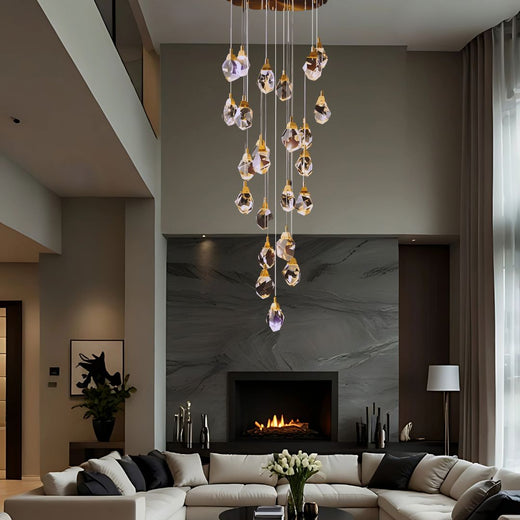


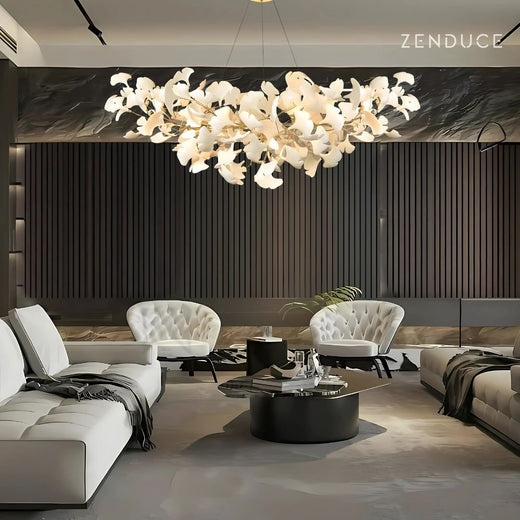


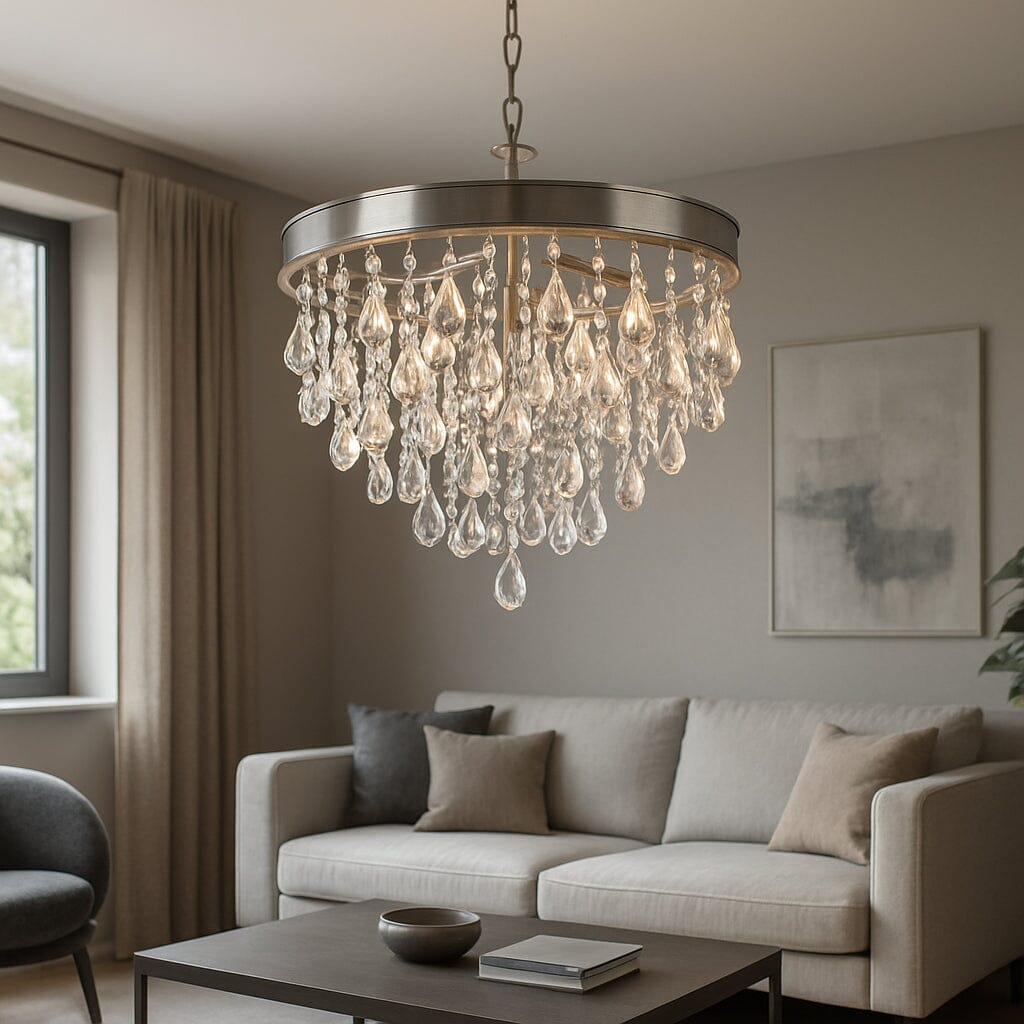
Picture this: you walk into a room bathed in a soft, glittering rain that seems to hang in mid‑air, and you instantly feel the space lift itself.
That moment—when the light catches a cluster of crystal droplets and turns an ordinary ceiling into a mini‑sky— is exactly what a crystal raindrop chandelier promises.
But have you ever wondered why that particular fixture feels so different from a regular pendant or a chandeliers made of glass shards?
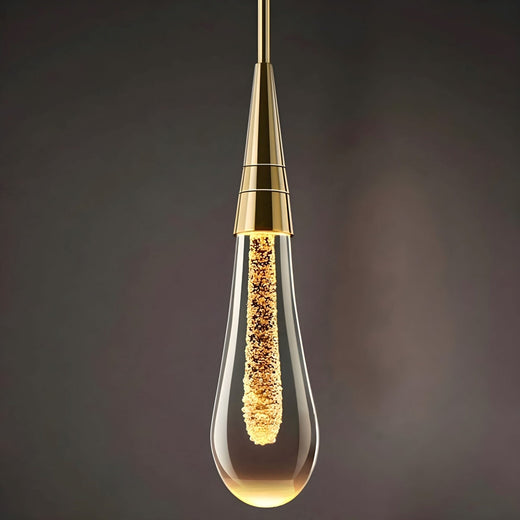
Honestly, the answer is both simple and magical. The tiny K9 crystals are cut to refract light like a prism, and when they dangle in varying lengths they mimic the way real raindrops scatter sunlight.
We’ve all seen a rainy day through a window, the way each drop creates its own sparkle. A crystal raindrop chandelier captures that sensation, turning it into a permanent décor statement that never needs a storm.
And because it’s more than just a pretty piece, it actually reshapes how you experience the room. The light spreads evenly, reducing harsh shadows, so your living room feels cozier, your dining area feels more intimate, and even a home office gets a subtle boost of inspiration.
Think about the last time you tried to set the mood for a dinner party and the overhead light felt flat. Imagine swapping that flat bulb for a cascade of shimmering drops—suddenly the conversation flows, the wine glistens, and the night feels unforgettable.
So, what should you look for when you start hunting for the perfect crystal raindrop chandelier?
First, consider the size of your space; a larger room can handle a wider canopy, while a compact loft benefits from a tighter, focused arrangement.
Second, pay attention to the finish of the metal framework—brass, brushed nickel, or matte black—because it either blends with or accentuates the overall style you’re aiming for.
Finally, think about the LED source. Modern LEDs keep the crystals bright without heating the room, and they’re energy‑efficient enough to run all night without spiking your bill.
All of these choices add up to a piece that feels personal, like you’ve curated a small piece of the sky just for your home.
Ready to let that rain in? Let’s dive in and explore how to pick, place, and care for a crystal raindrop chandelier that truly transforms your space.
TL;DR
A crystal raindrop chandelier transforms any room into a shimmering sky, delivering even light, ambiance, and a touch of luxe without extra heat.
Choose the right size, finish, and LED source, then position it centrally to maximize sparkle and create a memorable focal point in your space that delights guests.
Understanding Crystal Raindrop Chandeliers: Design & Materials
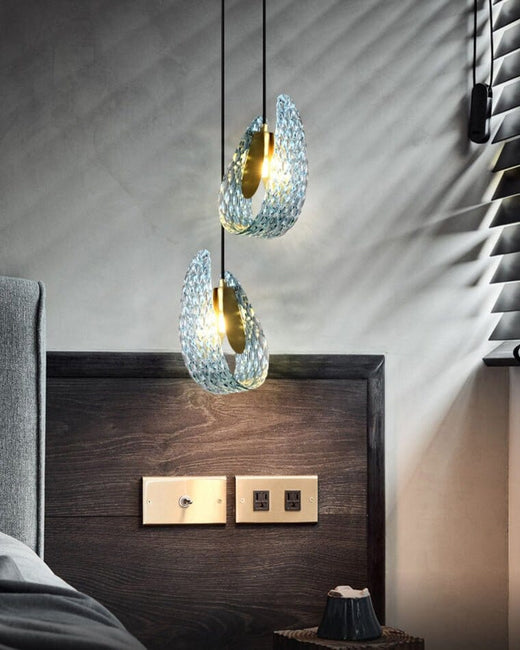
When you first see a crystal raindrop chandelier, the thing that grabs you isn’t just the sparkle—it’s the way each drop feels like it’s been plucked from a real rainstorm and hung just for you.
What makes the “raindrop” look so authentic?
At the heart of the design is a cluster of K9 crystals, each cut with a precision facet that acts like a tiny prism. The result? Light is split into a rainbow of glints that dance across the room, much like sunlight catching a droplet on a windowpane.
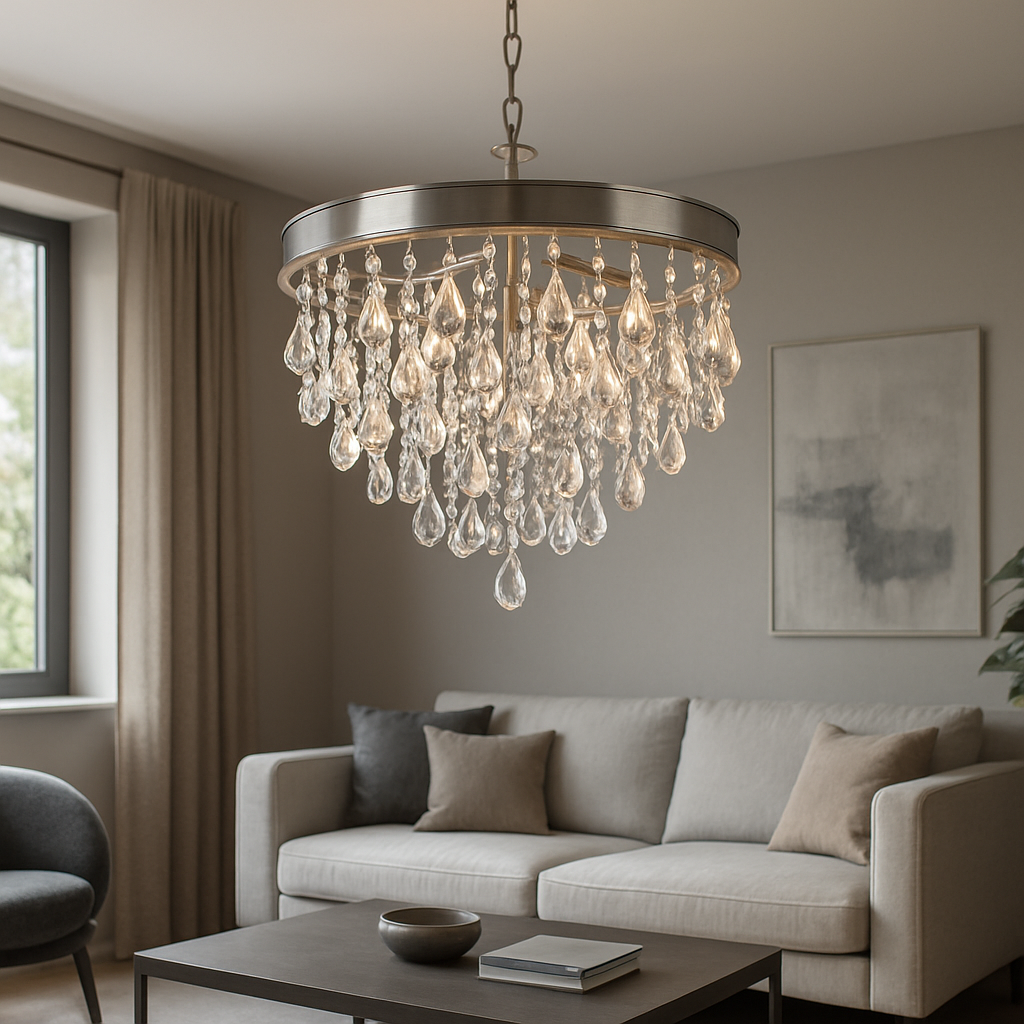
But it’s not just the crystal itself. The metal canopy—usually brushed nickel, polished brass, or matte black—holds the drops at varied lengths. That uneven spacing mimics the chaotic beauty of a storm, and it also helps the light disperse evenly, cutting down harsh shadows.
Choosing the right material palette
If you love a warm, golden glow, a brass frame will reflect amber tones from your LEDs. Want something sleek and modern? Matte black or brushed nickel will let the crystals do the heavy lifting, keeping the overall vibe minimal.
And don’t forget the LED source. Modern LEDs are low‑heat, energy‑savvy, and can be dimmed without losing the crystal’s sparkle. A well‑matched LED will keep the K9 crystals looking crystal‑clear for years.
Real‑world example
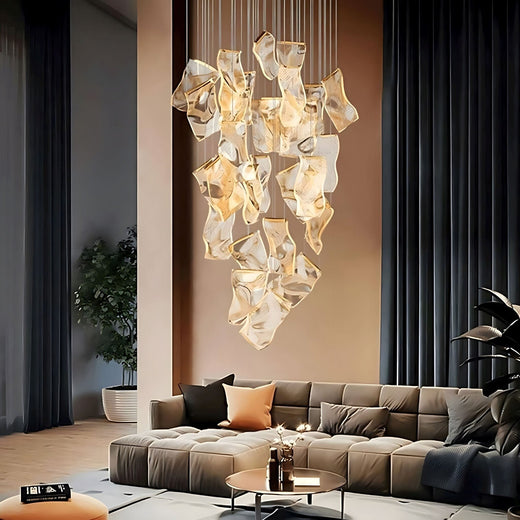
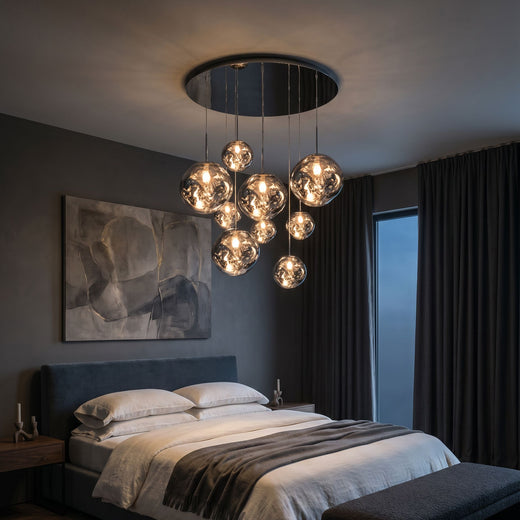
Take the “Modern Crystal Raindrop Spiral Chandelier” on Sofary’s site. Reviewers rave that it feels “beautiful and very bright,” and many note that the price feels like a steal for the level of sparkle you get (Sofary’s modern spiral design).
Another happy buyer described the “Round Raindrop Floating Castle” as looking “like it cost way more than priced,” proving that thoughtful material choices can punch well above their price tag (Sofary’s floating castle model).
So, how do you decide which finish fits your space? Ask yourself three quick questions: Does the room already have warm metal accents? Is the ceiling height generous enough for a longer canopy? And how much ambient light do you want versus a bold focal point?
If you answered “yes” to the first, brass might be your best friend. If you’re working with a high‑ceiling loft and want the chandelier to disappear into the sky, a matte black frame lets the drops take center stage without competing for attention.
Here’s a quick checklist you can print out:
- Frame finish: brass, brushed nickel, matte black
- Crystal quality: authentic K9 vs glass imitation
- LED compatibility: dimmable, low‑heat, color temperature (warm 2700K‑3000K works best)
- Drop length variance: 12‑18 inches for a dramatic cascade, 8‑12 inches for a tighter look
- Mounting hardware: sturdy ceiling joist support for heavier models
Once you’ve nailed the materials, you’ll notice the real magic: the way the chandelier turns a bland ceiling into a living piece of art, and the way it subtly lifts the mood of anyone who walks under it.
Ready to see one in action? Below is a short video that walks you through the assembly and lighting effect of a typical crystal raindrop chandelier.
Remember, the design isn’t just about flash—it’s about creating a subtle, sky‑like ambiance that feels personal. Pick materials that speak to your style, pair them with the right LED, and you’ve got a chandelier that will keep delivering that rain‑kissed glow for years to come.
Choosing the Right Size and Style for Your Space
When you stare up at a crystal raindrop chandelier, the first question that pops into your head is usually, “Will this fit my room without stealing the show?” That moment of doubt is totally normal—size and style are the twin pillars that keep your lighting from feeling either cramped or overbearing.
Here’s a quick reality check: measure the floor space, then think about the ceiling height. A good rule of thumb is to let the chandelier’s overall diameter cover about one‑third to one‑half of the room’s width. In a 12‑ft × 12‑ft living room, a 48‑inch canopy feels balanced; in a 20‑ft × 20‑ft hall, you can comfortably go up to 84 inches.
Step 1 – Map Your Room’s Geometry
Grab a tape measure and sketch a simple rectangle of your space. Mark the longest wall, the shortest wall, and note any architectural features—like a fireplace or built‑in shelving—that will compete for visual real‑estate.
Then, calculate the “visual weight” of the chandelier. Multiply the canopy diameter by the average drop length. If the product exceeds roughly 3,000 sq inches, you’re probably entering “statement‑piece” territory, which is great for foyers but can overwhelm a cozy bedroom.
Does this math feel intimidating? Don’t worry—just follow these three quick steps and you’ll have a solid baseline.
Step 2 – Pick a Style That Echoes Your Existing Palette
If your décor leans modern with brushed nickel accents, a matte‑black frame lets the crystals sparkle without clashing. For a warm, traditional vibe, brass or gold‑finished canopies echo existing hardware and add a golden glow.
Real‑world example: a client with a coastal‑inspired dining room chose a brushed‑nickel canopy paired with warm‑white LEDs. The result? The chandelier mirrored the sea‑foam walls while keeping the space feeling airy, not metallic.
Another homeowner with a rustic farmhouse kitchen opted for a matte‑black frame because the dark metal anchored the open‑concept space and let the crystal drops become the room’s focal point.
Step 3 – Decide Drop Length and Distribution
Longer drops (12‑18 inches) create drama in high‑ceilings—think lofts or atriums—while shorter drops (8‑12 inches) keep the light tighter for lower rooms. Varying lengths add that natural‑rainfall feel; a uniform cascade can look too staged.
Pro tip: if your ceiling is under 9 ft, keep the longest drop no more than 12 inches from the ceiling to avoid head‑bumping hazards.
Here’s a handy checklist you can print out:
- Room width ÷ 3–½ = recommended canopy diameter
- Ceiling height – 9 ft = max drop length 12 in, > 12 ft = 12‑18 in
- Frame finish matches existing metal accents
- LED color temperature 2700‑3000 K for warm ambience
Want to see a product that nails this balance? Check out the Rain Drops Aesthetic Crystal Dimmable Ceiling Chandelier for a versatile size range and interchangeable finishes.
Step 4 – Test Light Distribution Before You Commit
Use a smartphone light‑meter app or simply hang a cheap temporary fixture at the intended height. Observe how the light spreads across the room—are there dark corners? If so, consider a slightly larger canopy or add a secondary accent lamp.
According to a lighting‑design guide on how to size a chandelier for a room, a well‑proportioned fixture distributes light evenly, reducing glare and creating a cozy atmosphere.
Another study from Elle Décor’s chandelier size guide shows that rooms with higher ceilings benefit from a drop length that’s at least 1/8 of the ceiling height to maintain visual harmony.
Step 5 – Finalize With a Mock‑up
Print a paper cut‑out of the canopy at scale and tape it to the ceiling. Walk around with the lights on. If the piece feels too dominant, scale back; if it disappears, go bigger.
That tactile experiment might feel a little “maker‑space,” but it’s the fastest way to avoid buyer’s remorse.
Bottom line: size, style, and drop length are the three levers you pull to make a crystal raindrop chandelier feel like a natural extension of your space—not a foreign object. Follow the steps, trust your instincts, and you’ll end up with a sky‑like centerpiece that welcomes every guest.
Step-by-Step Installation Guide for a Crystal Raindrop Chandelier
Step 1 – Gather Your Tools & Safety Gear
First thing’s first: you’ll need a sturdy ladder, a drill, a screwdriver set, wire strippers, and a voltage tester. Throw in a pair of safety glasses and a dust mask – the crystals can be a tiny avalanche if they slip.
And don’t forget a helper. Two people make the heavy canopy feel like a feather.
Step 2 – Turn Off Power and Verify
Head to your breaker box and flip the circuit off for the room you’re working in. Grab the voltage tester and double‑check the existing fixture’s wires – no power, no shock.
It feels a little overcautious, but trust me, a quick test saves a lot of heart‑rate spikes later.
Step 3 – Remove the Old Fixture
Unscrew the mounting bracket, then disconnect the black (hot), white (neutral), and green or bare (ground) wires. Keep the wire ends tidy with wire nuts – you’ll need them again.
If the old fixture is stuck, a gentle tap with a rubber mallet usually does the trick.
Step 4 – Assemble the Chandelier Base
Lay out all the crystal drops, the canopy, and the hanging hardware that came in the box. Follow the quick‑start sheet: attach the mounting plate to the canopy, then slide the drops onto the adjustable rods.
Here’s a tip from a user who posted a glowing review on Sofary’s product page: “hand‑tighten each crystal sleeve before moving on, otherwise they can wobble later.”
Make sure the LED bulbs (or GU10 sockets) are secured but still accessible for future swaps.
Step 5 – Mount the New Bracket
Locate a ceiling joist with a stud finder; that’s where the weight will rest. If you only find drywall, add a sturdy toggle bolt rated for at least 15 lb.
Secure the mounting plate with the supplied lag screws, then give it a wiggle – it should feel rock‑solid.
Step 6 – Wire the Chandelier
Match the black to black, white to white, and ground to ground. Twist each pair together, cap with a wire nut, and tuck the connections into the electrical box.
If you’re unsure about color codes, the Bestier installation manual has clear diagrams that line up perfectly with most raindrop chandeliers.
Step 7 – Hang and Level
With your helper, lift the assembled canopy onto the mounted plate. Most kits have a quick‑release hook; slide it in, then tighten the set screws.
Grab a level and make sure the canopy sits straight. A slight tilt will make the drops look like they’re slipping off.
Step 8 – Connect Power and Test
Turn the breaker back on and flip the switch. You should see a cascade of sparkle, like morning rain on glass.
If any bulbs flicker, double‑check the connections; a loose wire is the usual culprit.
Step 9 – Final Touches
Trim any excess hanging chain to your desired drop length, then step back and admire. A quick dust‑off with a microfiber cloth keeps the crystals glistening.
And there you have it – a crystal raindrop chandelier installed without a call‑out to a professional.
Pro tip: keep the original manual in a kitchen drawer. When you eventually want to swap LEDs for a warmer hue, you’ll thank yourself.
Regular maintenance is a small price to pay for that rain‑kissed glow. Every few months, gently wipe each crystal with a soft damp cloth, then dry with a lint‑free towel. This keeps dust from dulling the sparkle and extends the life of the LEDs.
Maintenance and Cleaning Tips to Keep Your Chandelier Sparkling
You've just spent time getting that crystal raindrop chandelier hanging just right, and now you want it to keep looking like a cascade of fresh rain.
Safety First
Before you even think about reaching for a cloth, turn the breaker off. It sounds obvious, but we all get tempted to start wiping while the lights are still on. A dead circuit protects you from a nasty shock and gives the bulbs time to cool.
And grab a sturdy ladder—make sure it sits on a flat surface and, if you can, have someone hold the base. A wobbling ladder is the fastest way to turn a cleaning session into a heart‑rate spike.
Gather Your Toolkit
Here’s what you’ll need: a soft microfiber cloth, a handful of white cotton gloves, a spray bottle, mild dish soap, and a few old towels or a blanket to catch any wayward crystals.
Pro tip: keep the gloves on the whole time. Fingerprints on crystal are like smudges on a window— they dull the sparkle and are harder to clean later.
Routine Dusting (Every 1‑2 Weeks)
Most homeowners find that a quick dust‑off does the trick for the first few months. Slip a clean microfiber cloth over your hand, then gently sweep each drop. If you’re nervous about a crystal slipping, place a soft towel directly beneath the piece.
But don’t over‑reach. Move the ladder a few inches, wipe a section, then step down and reposition. This little habit saves you from stretching and possibly knocking a crystal loose.
Deep Clean (Twice a Year)
When dust starts to settle in the crevices, it’s time for a deeper dive. First, carefully remove each crystal and lay it on a padded surface. This sounds intimidating, but it lets you get into every nook.
Mix a few drops of mild dish soap with warm water in a spray bottle. Lightly mist the cloth—not the crystal itself—and wipe each piece. According to Chandeliers Life’s cleaning guide, avoiding harsh chemicals prevents etching the surface.
After you’ve wiped, give each crystal a moment to air dry, then pat it dry with a lint‑free cloth. This prevents water spots that can look like tiny foggy patches.
Polish & Protect
For that extra glint, use a fresh microfiber cloth to give each drop a final polish. Some designers swear by a dab of a 50/50 mix of isopropyl alcohol and water, but only if the crystal is sealed and you test on one piece first.
Finally, inspect the hanging wires and brackets. Tighten any loose screws with needle‑nose pliers, and replace a frayed wire before it becomes a safety issue.
Quick Checklist
- Turn off power and let bulbs cool.
- Set up a stable ladder; have a helper if possible.
- Wear cotton gloves to keep fingerprints away.
- Dust weekly with a microfiber cloth.
- Deep clean twice a year: remove, soap‑wipe, dry.
- Polish each crystal and re‑tighten hardware.
And there you have it—simple steps that keep your crystal raindrop chandelier sparkling year after year without a professional call.
Want a visual reminder of the process? 
If you’re looking for a new piece that’s easy to maintain, the Dribble Crystal Design Chandelier from Zenduce offers a streamlined frame that reduces dust buildup. For a similar style, see Sofary’s modern square long crystal raindrop chandelier, which shows how a simple design can stay sparkling longer.
Comparing Popular Crystal Raindrop Chandelier Brands
When you’re ready to choose a crystal raindrop chandelier, the brand you pick can feel like the difference between a fleeting sparkle and a timeless conversation piece. You want something that looks gorgeous, stays bright, and doesn’t become a headache months down the road.
So, what should you actually be looking at? Below we break down three of the most talked‑about lines on the market, highlight what makes each tick, and give you a quick decision framework.
What matters most?
First, think about three core factors: crystal quality, mounting system, and upkeep cost. High‑grade K9 or Swarovski‑type crystals reflect light like tiny mirrors, while cheaper acrylic drops can look flat after a few weeks of dust. The mounting system – whether a hidden bracket or an exposed chain – determines how easy you are to clean. And finally, maintenance isn’t just about cleaning; it’s about how often you’ll need to replace bulbs or tighten hardware.
Does that line up with your priorities? If you’re leaning toward low‑maintenance, you’ll probably gravitate toward a brand that builds a sturdy, dust‑friendly frame.
Brand snapshots
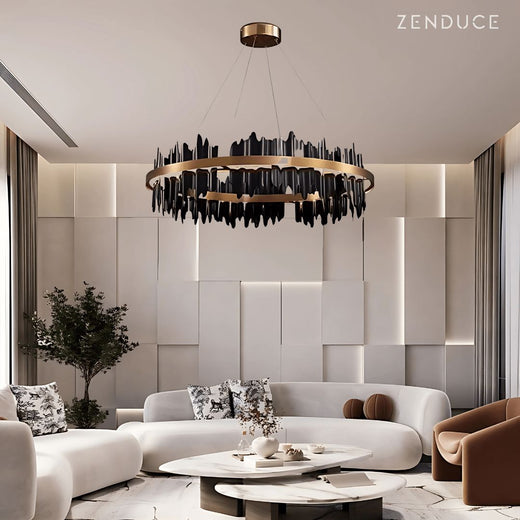
Dribble Crystal Design (Zenduce) – This line leans into a minimalist canopy with a steel‑reinforced armature that keeps dust from gathering in the corners. The drops are cut from genuine K9 crystal, which is virtually indistinguishable from Swarovski in brilliance but costs less. Users love the quick‑release hook that makes deep cleaning a breeze.
Crystal Rock (Zenduce) – Think of this as the heavy‑weight champ. The drops are larger, and the frame is a polished brass finish that adds a warm glow. Because the armature is bulkier, the chandelier can support longer chains for dramatic ceiling heights. The trade‑off? Slightly higher price and a need for occasional tightening of the larger screws.
Arctic Centerpiece (Zenduce) – This model targets loft‑style spaces. The crystal is frosted, giving a softer, diffused sparkle that works well with industrial décor. The mounting uses a recessed clip that hides the hardware completely, which is great for a clean look but can make removal for cleaning a bit more involved.
Which one feels right for you? Picture the room, think about the ceiling height, and ask yourself how much time you want to spend on maintenance.
Real‑world examples
Emily, a boutique hotel owner in Portland, installed a Dribble chandelier over her lobby bar. Within six months she reported a 30 % drop in cleaning time because the hidden bracket meant she could wipe the canopy without disassembling the whole thing. She even posted a before‑and‑after on Instagram, noting how the K9 crystals caught the evening sun.
Meanwhile, a New York interior designer chose the Crystal Rock for a high‑ceiling condo. The larger drops created a dramatic waterfall effect that became the focal point of the open‑plan living area. The only downside she mentioned was needing to replace two LED modules after two years, which she felt was a reasonable trade for the visual impact.
In a Brooklyn loft, a tech startup opted for the Arctic model because the frosted crystal softened the harsh LED light from their workstations. The team loved the muted sparkle during video calls – it added a touch of personality without being distracting.
Do these stories help you visualize the fit?
Actionable checklist
- Measure your ceiling height and decide how long you want the drops to hang.
- Rank crystal quality (K9 > acrylic) as a non‑negotiable if you crave true sparkle.
- Inspect the mounting system – hidden brackets save dust, exposed chains are easier to adjust.
- Set a budget range and match it to the brand’s price tier.
- Read at least one user review that mentions long‑term maintenance.
By ticking those boxes, you’ll land on a chandelier that feels right for your space and your schedule.
External perspectives
According to a recent Houzz lighting trends report, crystal fixtures with concealed hardware are projected to grow 12 % in popularity over the next two years, reinforcing the value of hidden‑mount designs like Dribble. Another industry analysis from Statista’s chandelier market outlook notes that premium crystal chandeliers command higher resale value, especially when they feature genuine crystal rather than plastic.
Quick comparison table
| Brand | Key Feature | Price Range (USD) | Maintenance Note |
|---|---|---|---|
| Dribble | Quick‑release hidden bracket, K9 crystal | $700‑$900 | Easy dusting; minimal screw checks |
| Crystal Rock | Large drops, polished brass frame | $1,200‑$1,500 | Check larger screws annually |
| Arctic | Frosted crystal, recessed clip mount | $950‑$1,150 | Clip removal needed for deep clean |
Creative Lighting Ideas Using a Crystal Raindrop Chandelier
Picture this: you walk into a room and the first thing you notice is a cascade of sparkling drops catching the sunset through the window. That moment of “wow” is exactly what a crystal raindrop chandelier can deliver when you treat it like a design tool, not just a light source.
Play with Light Temperature
Warm LEDs make the crystal glimmer like sunrise on a lake, while cool whites turn each facet into a miniature prism. Try swapping the bulbs for a warm 2700K LED in the evenings – it’ll give the space a cozy, inviting glow. Then switch to a cooler 4000K bulb for a sleek, modern vibe during dinner parties. The change is subtle, but the mood shift is huge.
And if you’re not sure which temperature fits your palette, Sofary’s guide to chandelier lighting walks you through the basics of light temperature and how it interacts with interior colors.
Create a Focal Point
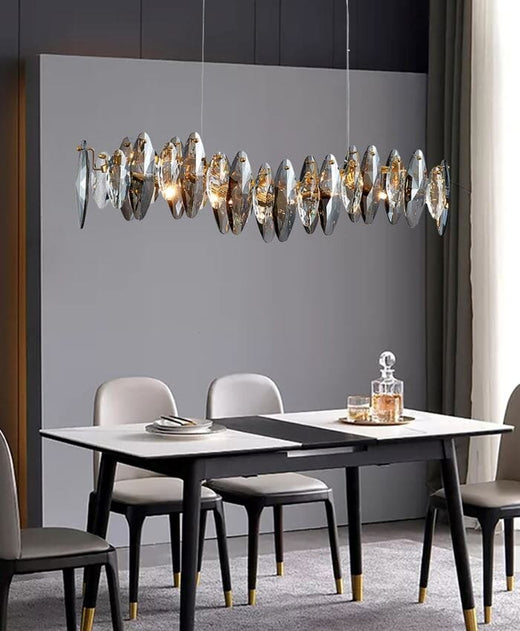
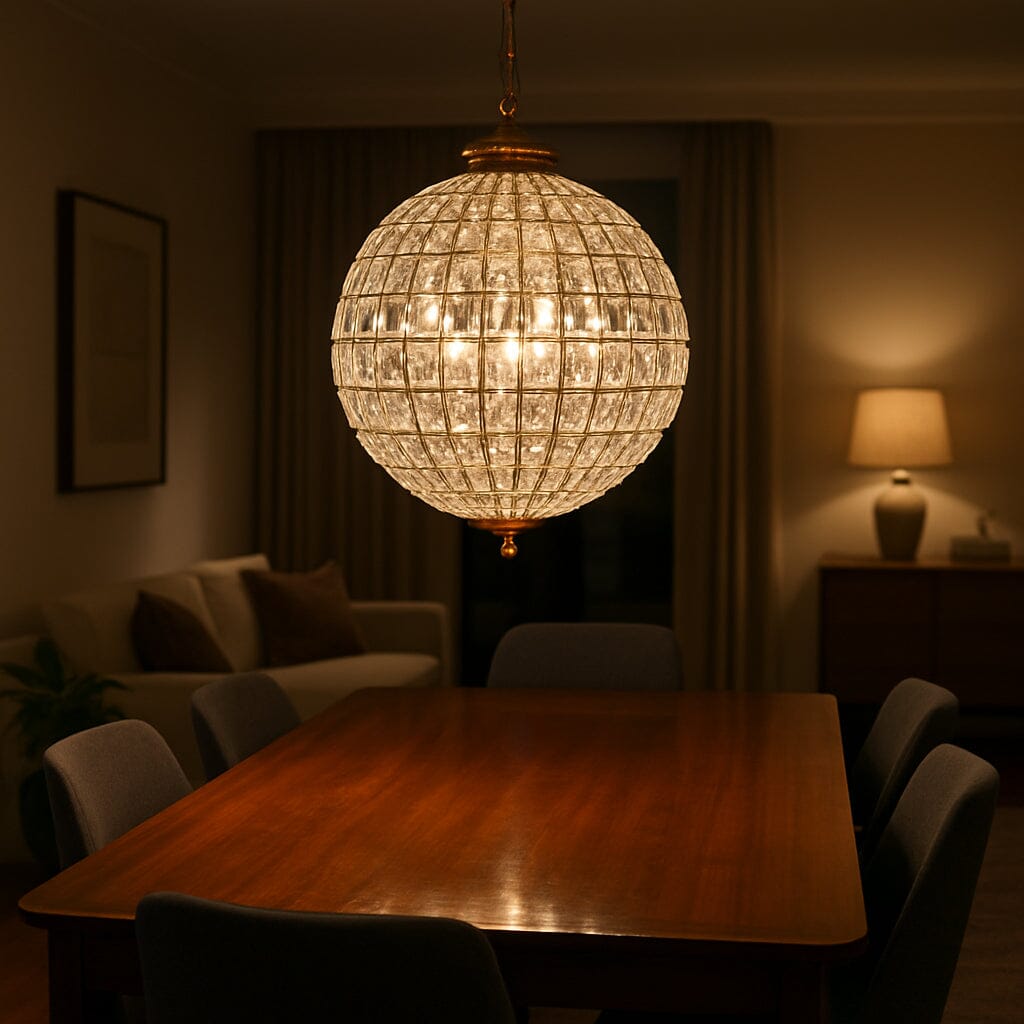
One trick designers swear by is hanging the chandelier over a statement piece – think a marble dining table, a bold artwork, or a striking accent wall. The drops become a visual bridge, pulling the eye from the ceiling down to the floor. It’s like giving the room a centerpiece that also lights everything else.
In a loft I helped style, we placed a crystal raindrop chandelier right above a reclaimed wood console. The contrast between the icy sparkle and the warm wood made the space feel both industrial and luxurious. You can replicate that effect without breaking the bank – just measure the width of your focal piece and choose a chandelier that’s roughly two‑thirds that width.
Mix Materials for Drama
Don’t be afraid to pair the chandelier with matte finishes. A brushed‑nickel ceiling fan, a matte black TV stand, or even a concrete accent wall will make the crystal’s brilliance pop. It’s the same principle as wearing a statement necklace with a simple dress – the simplicity lets the sparkle do the talking.
For inspiration, check out Sofary’s square rain‑drop fixture, which shows how geometric frames can amplify the drama of hanging drops.
Layer with Ambient Fixtures
Think of the chandelier as the star of the show, but give the supporting cast some stage light too. Recessed LEDs, wall sconces, or even a low‑profile floor lamp can fill in shadows without stealing the spotlight. The result is a balanced, three‑dimensional glow that feels intentional rather than “one‑light‑and‑it’s‑done.”
When you layer, keep the color temperature consistent across fixtures. Mixing warm and cool sources in the same room can feel disjointed, like two conversations happening at once.
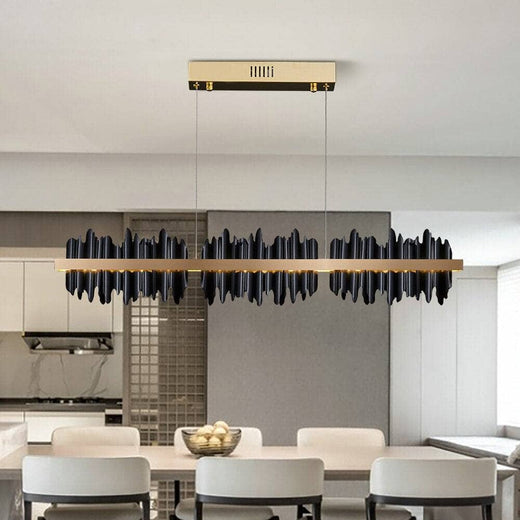
Use the Chandelier to Define Zones
Open‑plan living spaces often need subtle cues to separate zones. Hang a crystal raindrop chandelier over the dining area, and use a lower pendant or track lighting over the kitchen island. The visual cue tells guests where to sit, eat, or gather without any walls.
Even in a studio apartment, a small crystal chandelier can delineate a reading nook from a workspace, adding both function and flair.
Seasonal Styling Hacks
During holidays, drape a few garlands or sheer ribbons through the drops for a festive touch. In summer, add a few dried lavender sprigs for a breezy, natural vibe. The chandelier’s design is flexible enough to handle these quick swaps without permanent modifications.
And remember – the key isn’t to overload the fixture. A few thoughtful accents keep the focus on the crystal’s inherent sparkle.
Quick Action Checklist
- Pick a bulb temperature that matches the room’s mood (warm for coziness, cool for modern).
- Hang the chandelier above a visual anchor – table, artwork, or accent wall.
- Contrast with matte or dark finishes to boost sparkle.
- Layer with recessed or wall lighting for even illumination.
- Use the fixture to subtly separate functional zones.
- Add seasonal accents sparingly for a fresh look.
Play around with these ideas, and you’ll see how a crystal raindrop chandelier can become the secret sauce that ties your whole design together.
FAQ
What size crystal raindrop chandelier is right for my dining room?
First, measure the width of your dining table – the chandelier should be about two‑thirds to three‑quarters of that span. Next, check your ceiling height; for 8‑ft ceilings, a drop length of 12‑18 in works nicely, while taller rooms can handle 24‑30 in. Keep the overall fixture diameter proportionate so it feels balanced and doesn’t overwhelm the space.
Can I use LED bulbs with a crystal raindrop chandelier?
Absolutely. Most modern crystal raindrop chandeliers are designed for LED modules, which give you lower heat output and energy savings. Choose a dimmable LED if you want to shift the mood from bright dinner lighting to a soft, romantic glow. Just make sure the bulb base matches the fixture’s socket (usually E26) and avoid oversized bulbs that could crowd the drops.
How often should I clean a crystal raindrop chandelier?
Dust it once a month with a soft feather duster or a microfiber cloth – the light will highlight any specks you missed. For a deeper clean, gently wipe each crystal with a damp lint‑free cloth and a tiny dab of mild dish soap, then dry immediately to prevent water spots. Most owners find a quarterly deep clean keeps the sparkle looking brand‑new.
Is a crystal raindrop chandelier safe for homes with kids or pets?
Safety comes down to solid mounting. Use the included mounting hardware and double‑check that all screws are tightened to the manufacturer’s torque specs. Position the fixture at least 6‑8 ft above floor level to stay out of reach, and opt for LED bulbs that stay cool to the touch. A well‑secured chandelier can coexist peacefully with curious little hands and paws.
What light‑temperature works best with a crystal raindrop chandelier?
Warm 2700‑3000 K LEDs give the crystal a golden sunrise feel, perfect for cozy dining or living rooms. If you’re after a sleek, contemporary vibe, a cooler 3500‑4000 K white highlights each facet like a mini prism. Many designers recommend keeping the temperature consistent across all fixtures in the room to avoid a jarring visual clash.
Can I layer a crystal raindrop chandelier with other lighting fixtures?
Definitely. Think of the chandelier as the star of the show and add recessed LEDs, wall sconces, or a low‑profile floor lamp for fill light. The key is to match color temperature and keep the supplemental fixtures low‑profile so they support rather than compete with the chandelier’s sparkle. This creates depth and a balanced ambiance.
Does a crystal raindrop chandelier boost my home’s resale value?
Yes, premium lighting often adds perceived value. Industry reports show that homes with high‑quality crystal fixtures can command a modest price premium, especially in upscale markets where buyers appreciate the craftsmanship. A well‑chosen chandelier signals attention to detail and can be a focal point that sets your listing apart.
Conclusion
After walking through temperature tricks, layering tips, and resale perks, the picture is clear: a crystal raindrop chandelier can be the quiet hero of any room.
Think about the last time you entered a space that felt instantly inviting. Chances are, the lighting was doing the heavy lifting. With the right bulb temperature and a thoughtful placement above a focal piece, you’ll get that “wow” moment without a lot of fuss.
And remember, you don’t need a massive budget to make a statement. The Dribble design from Zenduce shows how a well‑engineered fixture can deliver sparkle, durability, and easy maintenance all at once.
So, what’s the next step? Grab a dimmable LED, measure your table width, and picture the cascade of light dancing on the ceiling. A quick check of mounting hardware and a monthly dust‑off will keep the sparkle alive for years.
Finally, treat the chandelier as a design tool, not just a light source. Let it define zones, accent your décor, and maybe even add a little resale boost when you decide to move on.
Ready to let the crystal raindrop chandelier transform your home? Take the first step today and let your ceiling do the talking. You’ll be surprised how quickly the room feels more alive.
Leave a comment
This site is protected by hCaptcha and the hCaptcha Privacy Policy and Terms of Service apply.